Introduction: Why the Clear Shot Defines Your Game
The badminton clear shot is one of the most fundamental and strategically important strokes in the game. Whether you are defending under pressure or preparing to launch an attack, mastering the clear allows you to control rally tempo, dictate court positioning, and buy crucial recovery time.
Yet most club and recreational players — including many who play regularly across India — rely on arm strength alone and never develop a truly deep, consistent clear. The result is short clears that invite immediate smashes, lost rallies, and physical fatigue from fighting the same losing battle repeatedly.
A well-executed clear combines explosive power with precise shuttle placement, pushing your opponent deep into the backcourt while giving you time to recover and reset. In this complete guide, you will learn:
What a clear shot is and when to use each type
The biomechanics behind generating genuine power
A step-by-step technique breakdown with coaching cues
Footwork patterns that set up every clear correctly
Structured drills for distance and accuracy
Common mistakes and exactly how to fix them
A 6-week progressive training plan
Quick Overview: Types of Badminton Clear Shots
Here's a summary of all four clear shot types and when to use them:
1. Forehand Clear → Played from dominant side; uses full body rotation for maximum power; most common clear variation
2. Backhand Clear → Played from non-dominant side; technically demanding; requires strong wrist control and body rotation
3. Defensive Clear → High and slow trajectory; used under pressure to buy recovery time and reset the rally
4. Attacking Clear → Flat and fast; surprises opponent; reduces their preparation time; used to disrupt rhythm
1. What Is a Clear Shot? Types & When to Use It
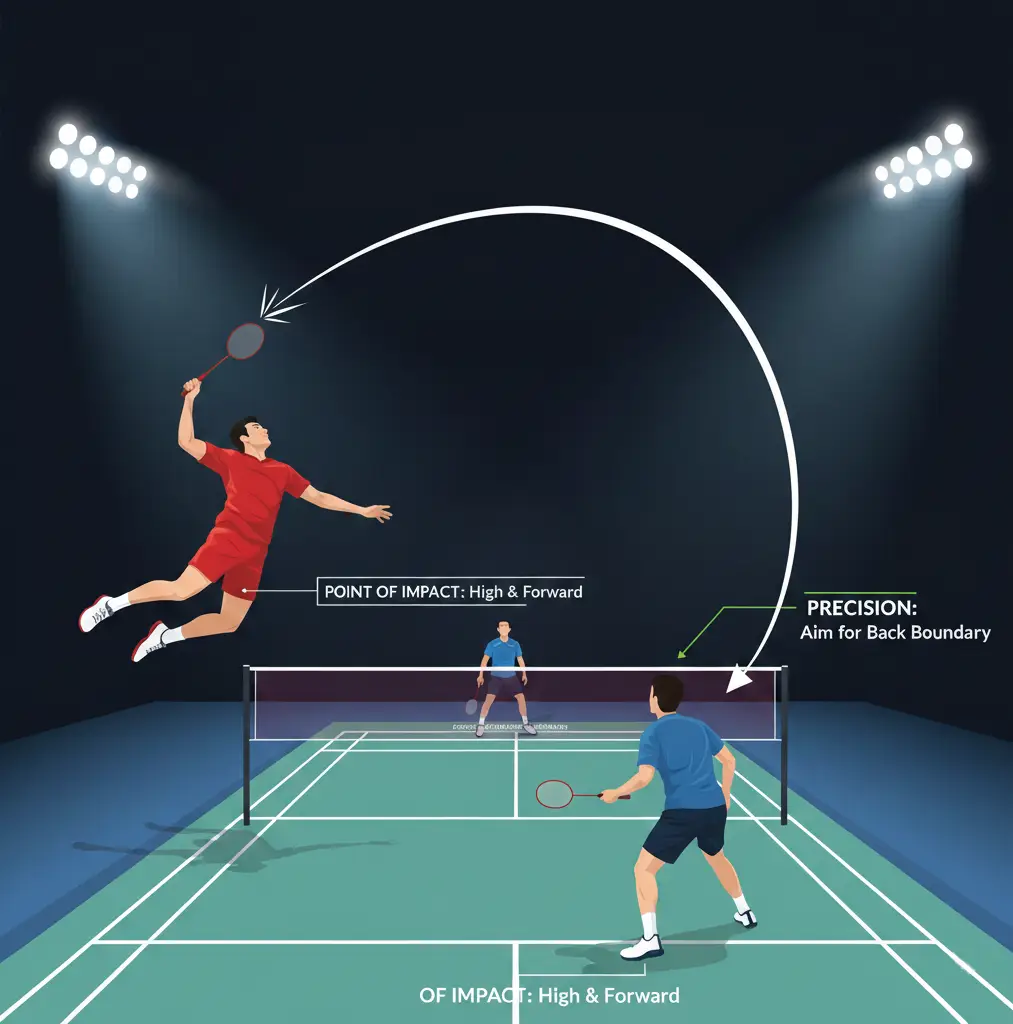
A clear shot in badminton is an overhead stroke that sends the shuttle high and deep toward the opponent's back boundary line. It is primarily used to create space, reset the rally, or force the opponent into a defensive backcourt position.
Forehand Clear
The forehand clear is played from the dominant side of your body. It allows maximum power generation because it uses full body rotation, shoulder movement, and forearm pronation. This is the most commonly used and strongest clear variation in both singles and doubles.
Backhand Clear
The backhand clear is played from the non-dominant side. Generating power here is more technically demanding — it requires precise timing, strong wrist control, and efficient body rotation. Advanced players use this to defend deep backhand corners without turning their back to the net.
Defensive Clear
A defensive clear travels high with a slower trajectory. It is used when you are under pressure — out of position, off balance, or recovering from a difficult shot — giving you extra time to return to your base position and reset the rally on your terms.
Attacking Clear
An attacking clear is flatter and faster than a defensive clear. It surprises the opponent and significantly reduces their preparation time. This variation is used to disrupt a passive opponent's rhythm and force a weak return from the back of the court.
When Should You Use a Clear?
When you need time to recover from a difficult or wide shot
When your opponent is positioned near the net or mid-court
To push an aggressive smasher back to the baseline
To reset the rally and regain control of the point
A smart clear is not just about hitting deep — it is about choosing the right moment, the right type, and the right target.
2. The Biomechanics Behind a Powerful Clear
Many players believe that wrist snap alone generates power in a badminton clear shot. In reality, power comes from a coordinated movement sequence known as the kinetic chain — a structured flow of energy from the ground upward through the body into the racket.
The Kinetic Chain Explained
1. Leg drive — Pushing off the ground creates the initial force that starts the entire chain
2. Hip rotation — Hips rotate forward to initiate upper body momentum
3. Trunk rotation — Core muscles rotate the torso, significantly increasing torque
4. Shoulder internal rotation — One of the biggest contributors to overall racket speed
5. Elbow extension — Adds acceleration to the downward swing
6. Forearm pronation — Creates explosive racket head speed at the critical moment
7. Controlled wrist flexion — Fine-tunes power and improves shuttle direction control
When all these movements flow together smoothly, the clear becomes powerful without excessive effort. Players who train this chain correctly hit deeper clears with less fatigue than those relying on arm strength alone.
Why Wrist-Only Technique Reduces Power
Relying only on wrist movement leads to clears that fall short, inconsistent shuttle placement, and higher risk of elbow and shoulder strain over time.
Instead, keep a relaxed grip throughout the swing and allow body rotation to generate most of the power. The wrist should enhance speed at the last moment — not create it from scratch.
Optimal Contact Point for Accuracy
For maximum power and precision, always aim to:
Contact the shuttle slightly in front of your body, not behind
Hit at full arm extension — not bent elbow
Keep the elbow high before contact
Maintain balance through correct foot positioning
Correct contact point ensures deeper clears and far better directional control.
3. Step-by-Step Technique Checklist
Improving your badminton clear shot requires attention to preparation, body mechanics, timing, and recovery. Follow this structured checklist in every practice session.
Step 1: Ready Stance and Preparation
Begin in a balanced ready position with knees slightly bent
Turn your body sideways so your non-racket shoulder faces the net
Shift your weight onto your back leg
Prepare your racket early — never wait for the shuttle to arrive
Coaching cue: Prepare early and stay relaxed. Tension before impact kills racket speed.
Step 2: Backswing and Loading Phase
Raise your racket arm with your elbow bent and positioned high
Lift your non-racket arm upward for balance and to assist rotation
Rotate your shoulders and hips backward to store rotational energy
Keep your grip relaxed throughout this phase
Coaching cue: Feel the tension building in your core — this stored energy releases explosively during acceleration.
Step 3: Acceleration Phase
Push off your back leg strongly to initiate the kinetic chain
Rotate your hips and torso forward explosively
Extend your elbow toward the shuttle
Rotate your forearm (pronation) just before contact
Tighten your grip slightly only at the moment of impact
Coaching cue: Rotate first, then whip the forearm through the shuttle. The rotation creates the power — the forearm and wrist direct it.
Step 4: Contact Point
Strike the shuttle at the highest reachable point above your head
Contact it slightly in front of your body — never beside or behind
Keep your wrist firm but not stiff at impact
Eyes on the shuttle until contact
Step 5: Follow-Through and Recovery
Allow the racket to follow through naturally across your body
Regain balance immediately after contact
Return quickly to your base position — do not admire your clear
Stay on the balls of your feet, ready for the next shot
Coaching cue: A strong clear always ends with fast recovery. Recovery is part of the shot.
4. Footwork and Positioning to Create Power
Even with perfect swing mechanics, your badminton clear shot will lack depth if your footwork is late or your starting position is wrong. Strong positioning allows you to transfer body weight efficiently and strike the shuttle at the optimal contact point.
Why Early Preparation Matters
Reaching the shuttle early gives you better balance, more time to rotate your body, greater control over shuttle direction, and improved recovery after the shot. Late positioning forces rushed swings, reducing both power and precision significantly.
Footwork for Forehand Clear
Perform a split step as your opponent hits the shuttle
Move quickly backward using chasse steps or crossover steps
Turn your body sideways while moving
Plant your back foot firmly before executing the shot
Your final step should leave your body fully rotated and stable
Footwork for Backhand Clear
Use quick crossover steps to reach the backhand corner
Pivot your hips and shoulders as you prepare the shot
Maintain balance and avoid leaning excessively backward
Generate power from the ground up, not from the arm alone
Positioning Tip for Maximum Power
Always aim to hit the shuttle when it is above shoulder height, slightly in front of your body, and within comfortable reach. If you are off-balance or stretched too far behind, power output drops dramatically and placement accuracy suffers.
💡 Want to improve your clear shot technique under professional guidance? Rackonnect's certified coaches provide structured technical sessions for all playing levels across Delhi NCR. Explore coaching programmes →
5. Drills to Build Power and Precision
Drill A: Shadow Clear Drill (Technique Focus)
Purpose: Improve movement pattern and coordination without shuttle pressure.
Stand in ready position at center court
Move to the backcourt using proper footwork
Perform a full clear swing in slow motion — no shuttle
Focus entirely on body rotation and forearm pronation
Repeat 15–20 times per side, 3 sets
Coaching focus: Maintain rhythm and balance throughout the movement. Speed comes later — technique first.
Drill B: Multi-Shuttle Clear Drill (Consistency Training)
Purpose: Build endurance and repeatable technique under fatigue.
A partner feeds shuttles continuously to the backcourt
Hit consistent deep clears — alternate cross-court and straight
Aim for 10–15 consecutive accurate clears per set
3 sets with 90-second rest between
Coaching focus: Maintain proper contact point even as fatigue builds. This is where technique either holds or breaks down.
Drill C: Target Accuracy Drill
Purpose: Improve placement precision for match application.
Place cones or markers near the back boundary lines in both rear corners
Attempt to land clears within one racket length of the target
3 sets of 10 attempts on each side
Track your accuracy percentage and aim to improve each session
Coaching focus: Control trajectory height and shuttle angle — not just direction.
Drill D: Power Conditioning (Off-Court)
Purpose: Increase explosive strength that directly feeds the kinetic chain.
Medicine ball rotational throws — 3 sets of 10
Resistance band shoulder rotations — 3 sets of 15 each direction
Core rotational exercises (Russian twists, cable rotations) — 3 sets of 12
Single-leg balance jumps — 3 sets of 10 each leg
Stronger legs and core muscles directly enhance power generation during every clear you hit.
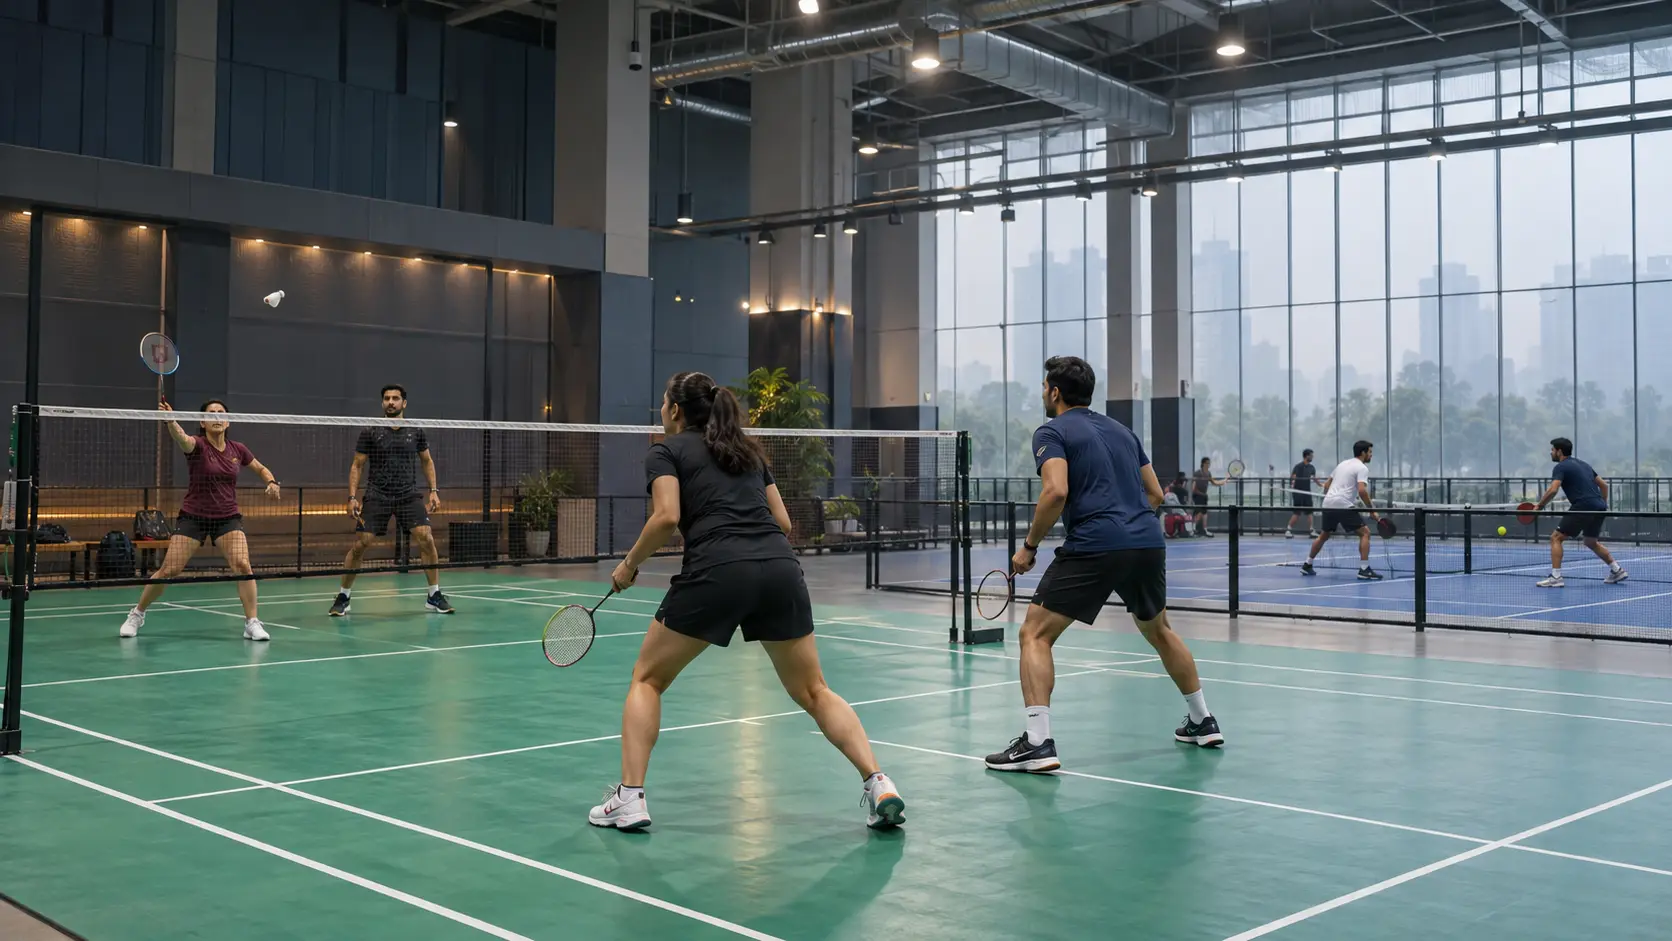
🏸 Book a court and practice these drills today. Rackonnect venues across Delhi NCR offer premium courts with consistent surfaces for year-round training:
6. Common Mistakes and How to Fix Them
Mistake 1: Overusing the Wrist
Problem: Clears fall short and lack depth, placing you under immediate pressure. Fix: Focus on hip and shoulder rotation. Let forearm pronation generate racket speed. The wrist fine-tunes direction — it does not create power.
Mistake 2: Late Contact Point
Problem: Shuttle goes flat, clips the net, or lands mid-court instead of deep. Fix: Prepare your feet and racket earlier. Move to the shuttle — don't wait for it. Strike at the highest reachable point above your head.
Mistake 3: Tight Grip Throughout the Swing
Problem: Reduced racket head speed; arm fatigue; reduced depth. Fix: Keep your grip relaxed during preparation and throughout the swing. Tighten only at the precise moment of impact, then relax again immediately.
Mistake 4: Poor Recovery After the Shot
Problem: Opponent exploits the open court space you leave behind. Fix: Build recovery as a habit — not an afterthought. Practice returning to base position immediately after every clear in every drill, not just matches.
Mistake 5: Inconsistent Trajectory
Problem: Clears land mid-court instead of deep backcourt. Fix: Adjust swing angle upward and ensure full arm extension at contact. Record your practice sessions on a phone camera and review your contact point height.
Mistake 6: No Variation Between Defensive and Attacking Clears
Problem: Opponent reads your clear and moves early. Fix: Practice both flat attacking clears and high defensive clears. Mix them during rallies to create uncertainty and slow your opponent's anticipation.
7. Six-Week Progressive Training Plan to Master the Clear
Consistency and progression are the keys to mastering the badminton clear shot. Follow this structured plan to build from correct technique to match-ready power.
Weeks 1–2: Technique Foundation
Focus: Correct mechanics and body coordination before adding power.
10 minutes shadow clears (slow to moderate speed)
15 minutes footwork drills — rear court movement patterns
15 minutes controlled partner clears (half-court distance)
Core strengthening exercises — planks, rotational holds
Goal: Develop proper swing sequence and timing. Do not rush pace.
Weeks 3–4: Controlled Power and Consistency
Focus: Depth and repeatability across a full training session.
Multi-shuttle clear drills — 3 sets of 15 shuttles
Cross-court and straight clear combinations
Target accuracy training with cones near the baseline
Medicine ball rotational throws — 3 sets of 10
Goal: Achieve consistent backcourt depth with improved balance and contact consistency.
Weeks 5–6: Match Simulation and Explosive Power
Focus: Game-speed performance under realistic conditions.
Randomized multi-shuttle drills — mixed directions
Clear-to-smash combination practice
Pressure drills — clears executed under fatigue (after footwork circuits)
Full-court practice matches emphasizing deep clear usage
Goal: Execute powerful and precise clears confidently under match conditions.
8. Equipment and Grip Recommendations
Your equipment setup influences both power output and precision.
Racket Selection
Head-heavy rackets — Support stronger clears and smashes; better for baseline-focused players
Even-balanced rackets — Better control and maneuverability; suited for all-court players
Choose based on your playing style and physical comfort, not just what professionals use.
String Tension
Lower tension (20–23 lbs) — More power and shuttle rebound; better for beginners building distance
Higher tension (24–28 lbs) — Greater control and precision; better for advanced players with established technique
Beginners and intermediate players typically benefit from slightly lower tension for easier power generation while developing mechanics.
Grip Technique
Use a basic forehand grip for all overhead clears. Keep your grip relaxed during preparation and tighten slightly only at impact. Proper grip relaxation improves racket head speed and significantly reduces the risk of elbow and shoulder strain over time.
Frequently Asked Questions (FAQ)
Q: Is wrist snap the most important factor for a powerful clear? No. Power primarily comes from coordinated body rotation, shoulder movement, and forearm pronation working together as a kinetic chain. The wrist contributes to fine-tuning speed and direction at the last moment but should not generate power alone.
Q: How can I hit deeper clears consistently? Focus on three things: early preparation so you reach the shuttle in time, correct contact point at the highest reachable position, and full arm extension at impact. Practice multi-shuttle drills regularly to maintain technique even when fatigued.
Q: Why does my clear fall short during matches? Common causes are late positioning, tight grip throughout the swing, and incomplete body rotation. Improve your footwork so you arrive early, maintain a relaxed grip, and focus on initiating the swing with hip rotation rather than arm movement.
Q: What is the difference between a defensive and attacking clear? A defensive clear is hit high and slow to buy recovery time when under pressure. An attacking clear is hit flat and fast to rush the opponent and create a weak return. Both have their place — mixing them makes your game unpredictable.
Q: How often should I practice clears? Train clears at least 2–3 times per week within structured sessions. Combine technique drills, footwork practice, and physical conditioning for the fastest improvement.
Q: Can I improve my clear shot without a training partner? Yes. Shadow clears (technique drills without a shuttle), wall drives, and off-court conditioning exercises can all be done alone. However, multi-shuttle feeding drills with a partner or coach accelerate improvement significantly faster.
Q: At what string tension should a beginner start for clears? Beginners should start between 20–22 lbs. This tension provides enough power assistance to develop distance while learning correct technique. As mechanics improve, tension can be increased gradually for more control.
Conclusion: Make the Clear Your Strongest Asset
The badminton clear shot is far more than a defensive stroke — it is a tactical weapon that controls space, tempo, and rally direction. By understanding the biomechanics behind genuine power generation, refining your technique step by step, and following structured progressive drills, you can transform your clear from a liability into one of your most reliable tools.
Strong footwork, full body rotation, relaxed grip, and consistent practice are the four pillars of an effective clear. When executed correctly, a deep and precisely placed clear gives you the time and position to dominate rallies and build attacking opportunities from the back of the court.
Apply these techniques in your next training session, follow the 6-week plan with discipline, and your clears will become noticeably deeper and more consistent within weeks.
Ready to accelerate your improvement with structured coaching and premium courts?